Hello everyone this is an HP Officejet Pro 8620 that we’re gonna remove a power supply on and the logic board as well. I’ll show you how to do that, it’s a simple process you’ll need a t10 star-shaped screwdriver, or a screwdriver tip.
Replacing Power Supply Unit and Logic Formatter Board on HP Officejet Pro 8620
Bas$ically it’s hard to show but it’s star-shaped, and the size is T10. HP 8610, 8620, 8615, 20 20 30 and 25 they’re pretty much the same and they have same removal process.
8600 series and 8600 plus are similar, and will also have the same build on the inside if you want to replace the power supply, or the logic board.
So what we’re gonna do is, you can see on the front here, if you open this cartridge door there’s one screw that we’re gonna remove here but we’re gonna do a blast there’s two screws on the back that were first gonna remove.
And the screws are located in these two areas there’s one here and one here and this is the panel that we need to remove in order to get access to the power supply. So we’re gonna remove these two board, the screws here.
Two are removed and the reason why we want to do this site last is we’re gonna use it as something that will pop the panel open. So we’re gonna unscrew it and keep the screw in here, and we’re gonna use it to push the panel out, and that’s what it does.
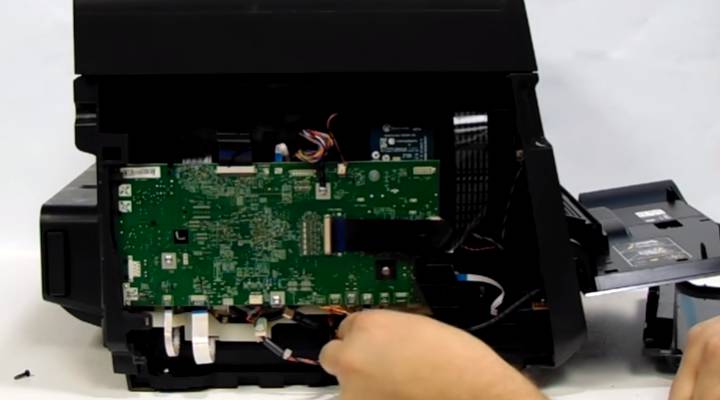
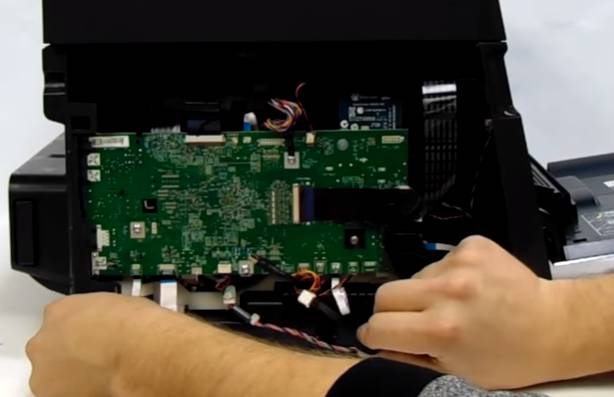
You push it with the screw push it out and it’s a simple removal. There’s gonna put the screw out so we don’t lose it. So we have a logic board here, and a power supply there.
In order to remove the power supply without removing logic board, what we’re gonna need to do is there’s some wiring right here but we don’t need to remove all of it just this harder one right here will give us access and then also the cord that basically is connect the power supply core.
Read Also: How To Print Double Sided On Hp Printer
Wire that is connected to the closet and there’s two screws, that hold the power supply and it’s the they’re both at the bottom one here. You got that one out and this one here.
You got these two screws out, and then these all these oars they should be good and not in our way. So we’re gonna do this just slightly lift the power supply, and just pull it out of there but in a straight pass like this.
Here I’m sure you don’t pull any ports to would need damage. So in order to put the power supply back its same process and reverse. And then to remove the logic board here, we’re going to first this connect all cords.
Very carefully, be careful not to live any of the plastic pieces that are attached to the board itself. There’s a few screws that hold the board.
It is a good thing to do, to take picture before you remove anything. so you can see the process of putting everything back, or may make a video of how you are removing it in. Order to avoiding the connection issues or anything like that when putting the printer back together.
Looks like it’s loose now. There still are some pores that are in the bag that are attached to the board we will disconnect attached to the board we will disconnect them.